Without question, the most important aspect of a modern day smartphone is the display. Without it, there's no way to interact with our devices! No text messaging, no internet browsing, no online shopping - can you imagine?
And that's why I LOVE customizing any and every smartphone I own. If I'm going to be looking at a phone's display and interacting with it as often as I do, then I might as well personalize it and make it my own, right? And it's this reason alone that sways me towards using Android phones.
Whilst iOS does offer some levels of customization (thanks to the recent iOS 14 and 15 updates), which I covered at length in this video here, it’s still much easier to take control of your phone on Android.
BUT, ever since the introduction of gestural navigation on Android, using a third party launcher is no longer the ideal choice for customization, unless you’re happy to sacrifice a bit of fluidity.
So with that being said, for all the Android users out there, welcome to your deep dive on how to level up your customization skills, all whilst using the stock launcher that ships with your phone!
Level 1 - Change Your Wallpaper
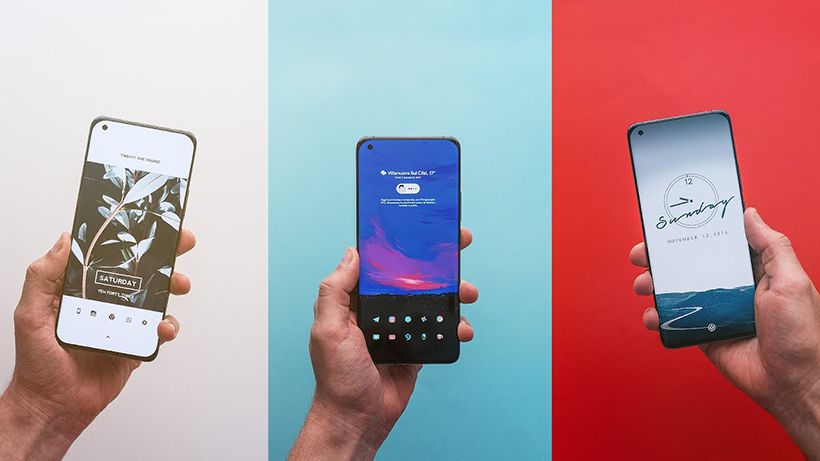
The first level of customization is to change your phone’s wallpaper.
Seems simple, right? But I genuinely believe that choosing the right wallpaper can really freshen up any old phone.
There are really two main categories to choose from when it comes to wallpapers: Photography based and Abstract backdrops, but whichever way you go, the number one rule is to ensure it’s clean enough so that the application icons and widgets sitting on top of the wallpaper can be seen easily.
So then, where do we get good, clean wallpapers from?
Now there are hundreds, upon hundreds of wallpaper applications that you can find on the Google Playstore, but if I could only limit your search to two, I would suggest the Backdrops application, and Resplash.
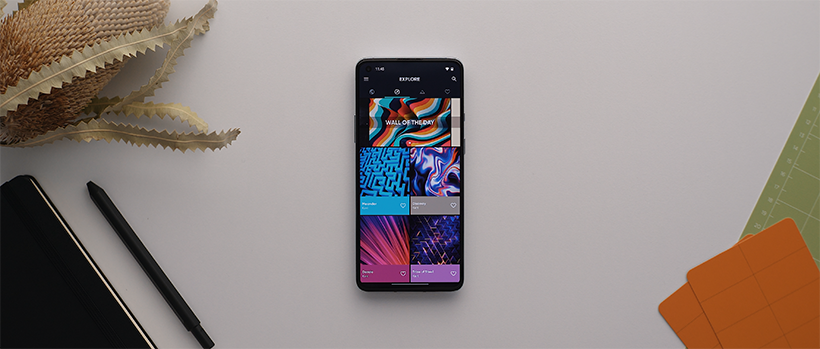
Backdrops is really one of the best wallpaper applications for abstract walls, because it has such a diverse range of backdrops and yet most of them are also pretty solid options for creating a really clean, yet unique looking home screen setup.
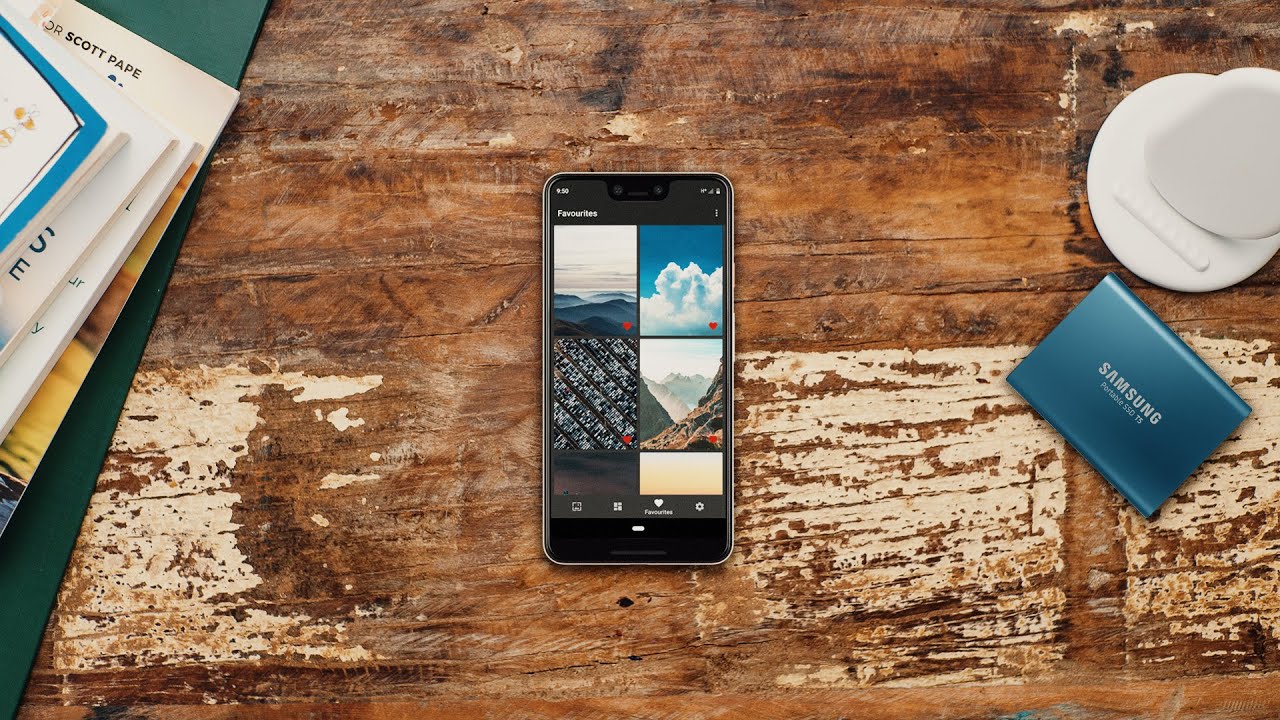
Resplash, though, is a fantastic photography based wallpaper application.
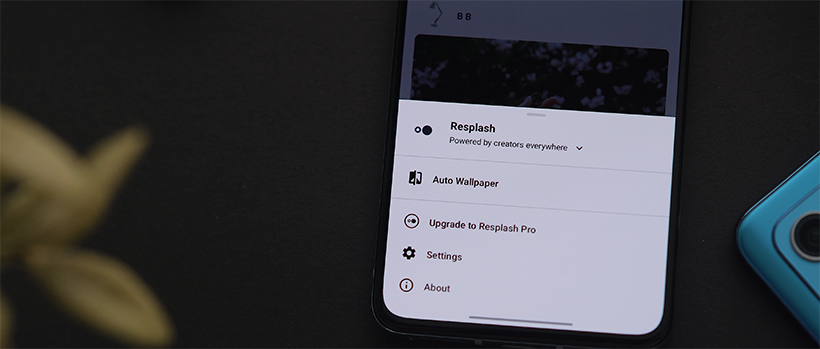
It’s actually what we call an Unsplash client, and if you haven’t heard of Unsplash, it is a phenomenal website filled with high quality images that are completely free to use in any context, and a lot of the images do make for fantastic wallpapers.
But whether you go for Abstract or Photography based, remember to pick a wallpaper that isn’t overly detailed. Simple is best!
Level 2 - Icons Packs and Widgets
Okay, moving to level two in our five levels of customisation: icon packs and widgets.
Most stock home screen launchers use pretty plain icon packs by default and so using a custom icon pack can be one of the best ways to make a home screen look super clean.
The best part is that there are hundreds of beautifully designed third party icon packs available on the Google Playstore, many of which are even free, and so the choices you have in terms of style are really endless.Now some stock home screen launchers do allow for icon theming, but not many, and so, if your particular home screen launcher doesn’t support icon theming, then in order to setup custom icons, we’re going to have to utilise an application called Shortcut Maker.
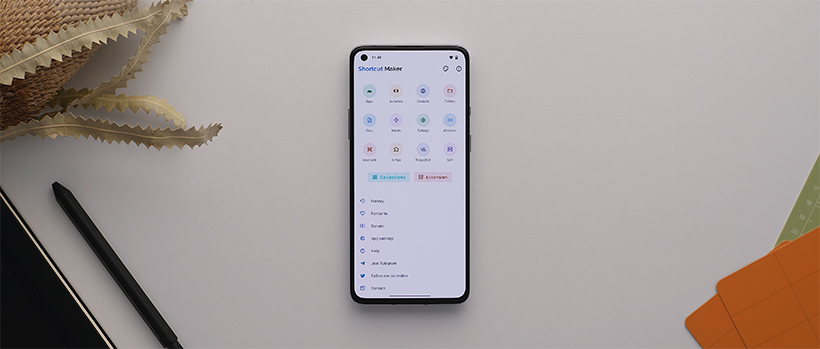
This is an amazing application that is free, and we can use it to essentially create widgets for each of the custom app icons we want on our home screen.
If you want to see exactly how to complete this process, then I highly suggest watching my Pixel Launcher Home Screen Setup tutorial video here.
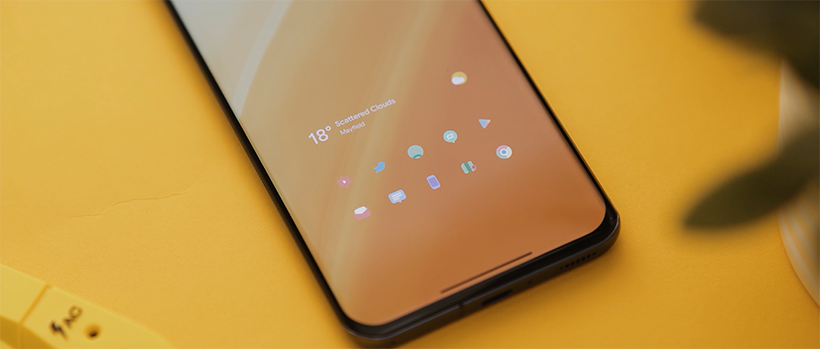
As well as custom icon packs, level two also involves incorporating pre-made widgets into our home screen setups.
A lot of apps these days have their own inbuilt widgets, but an even better option for widgets is to utilise an application called KWGT.
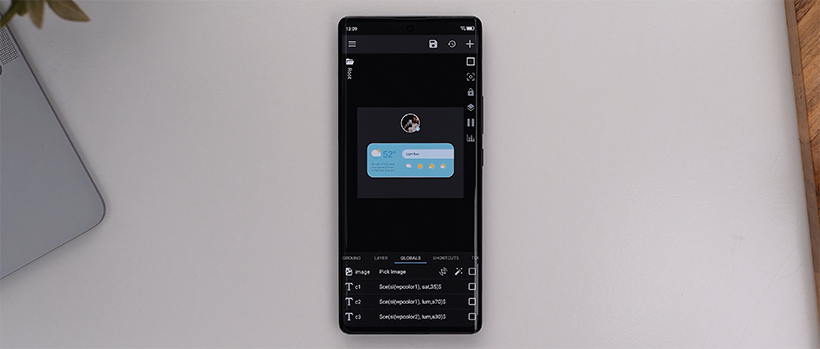
Like Shortcut Maker, KWGT is also a custom widget maker application, but this one takes things to another league altogether by letting you create super customized widgets from the ground up.
The great part though, is that a lot of graphic design artists and developers have done a lot of the hard work for us by creating their own packs of custom made widgets, and then wrapping them all together into what we call a widget pack, which you can then find on the Google Playstore.
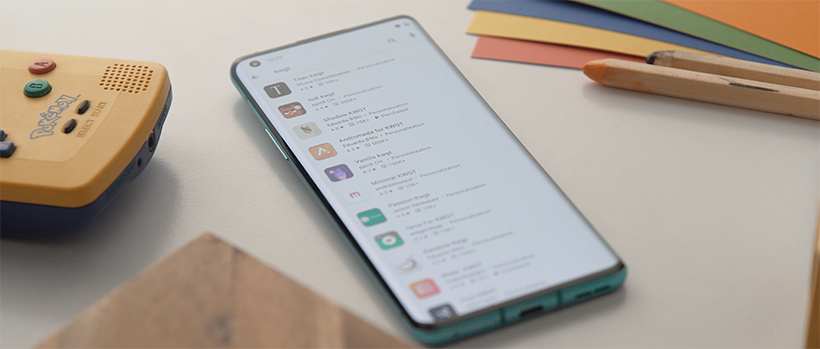
Just like icon packs, there are hundreds of third party KWGT widget apps to find on the Google Playstore, again, many of which are free, and all you have to do is just install a pack, and then open the KWGT app, and all of the pre-made widgets will show up.
Now for most people, level two is where I suggest tapping out.
You can develop some really phenomenal home screen setups with just your phone’s stock launcher using premade icon and widget packs, so there’s really no need to go any further.
BUT, if you do wanna take things to yet another level, let’s press on.
Level 3 - Custom Icon Packs
Now, whilst third party icon packs can get most of the job done, often they don’t support every single app installed on your phone, and so if that is the case, then you can actually create your own custom icon packs, without ever leaving your phone.There are two applications I highly recommend using for this process, the first being the Icon Pack Studio, and the second being Adapticons.
With Icon Pack Studio, you can use the advanced editor to essentially create awesome icon packs from scratch within seconds.
You can adjust pretty much any element of the icon, you can use special filters like shadows or bezels, and not only that, you can even import existing icon packs and use that as the platform with which to build upon.
Once complete, the app will export an icon pack APK file that you can install as you would any regular icon pack from the Google Playstore.
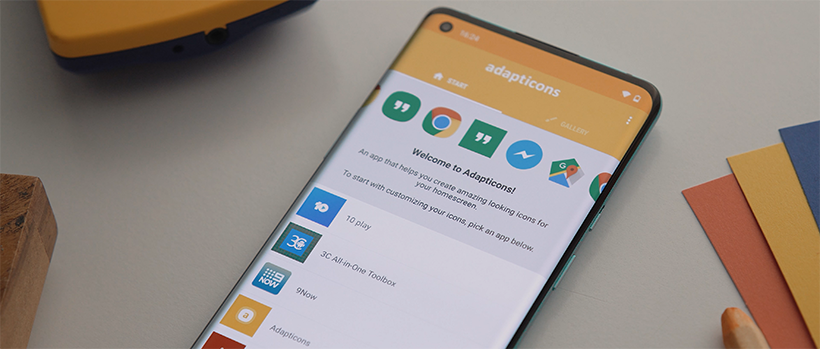
As for Adapticons, it’s actually a similar concept to the Icon Pack Studio application, but more so for single icons. What I use it most for is to import images from my phone’s image gallery to use as icons.
Like the Icon Pack Studio application, it will also export an installable icon pack that you can then use to customise your phone’s icons.
Level 4 - Custom Widgets
Now, if you thought creating your own customised icon packs was fun, wait til you get a load of level four: customising widgets.
So, as mentioned back in level two, one of the best ways to setup widgets is to use the pre-made widget packs for KWGT.
But what’s great is that when you load these widget packs into KWGT, you actually get the ability to see every single element within that widget, and if you want, change any element as well.
So this means, if you’ve got a purple backdrop but the widget you love is using a fluro green accent colour that doesn’t match, well just dive on in and change the colour to one that suits a bit better.
Or perhaps you love pretty much everything about a widget you’ve found, but there’s a bit of text at the top that just doesn’t fit. Well, jump in and delete it.
Seriously, pretty much any customisation you can think of is possible within this app, and I love it!In fact, you can get so crazy with KWGT that you can even use it to create entire home screen setups. I actually covered this entire process in detail in my MIUI home screen setup tutorial video, which you can watch here.
Level 5 - KLWP
Now for our final level of customisation, we’re going to discuss how you can essentially load an entire home screen launcher onto your phone’s stock home screen launcher, and that is by using an application called KLWP.
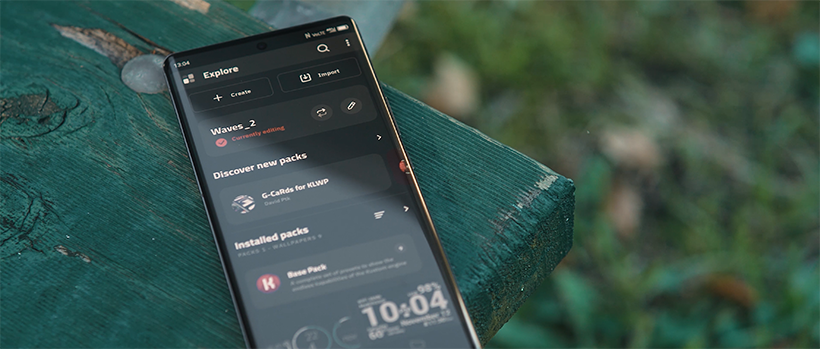
If you haven’t heard of KLWP, it is another application in the Kustom family, and it basically allows you to create entire home screen setups, complete with animations, widgets and icon packs. Once setup, to get it to work, you simply set it as your phone’s wallpaper.
And so this results in essentially a third party home screen launcher experience, using your phone’s stock launcher.
Now, creating your own KLWP setups from scratch is another kettle of fish altogether, one I’m not prepared to tackle in this article, but thankfully, like third party icon and widget packs, there are a bunch of very creative and intelligent developers who have done the hard yards for us and have created KLWP preset files that can be downloaded via the Google Playstore.
You can then dive in and customise these KLWP presets to ensure they fit the way you want your setup to look and feel, but then once all is said and done, you apply it as your wallpaper, clear everything from your home screen and there you go.
More often than not, these KLWP setups will require you to have several pages on your home screen, to ensure the swiping functionalities work as intended, and given that pretty much all stock home screen launchers don’t allow you to create blank pages, you’ll want to install an application called Blank Widget, and load that onto as many pages as necessary.
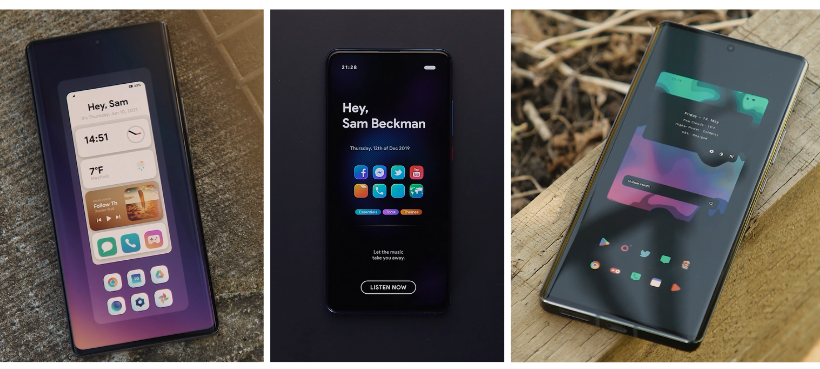
Some of the absolute best looking and most functional setups I’ve ever come across have been KLWP based, and that is because the level of control you have is essentially limitless. Just to whet your appetite, here are some of the impressive home screen setups I’ve featured on my channel, that have been created using KLWP:
Conclusion
But there you have it! That is your deep dive into what I consider the five levels of Android customisation using the stock launcher that comes shipped with your phone.
If you’re now wanting some inspiration for what your next home screen setup could look like, then check out this YouTube Playlist. It features some of the best home screen setups you might ever come across!
And if you manage to create a slick home screen setup you’re really proud of, share a screenshot on the Samsung Display Facebook Page!
Until then, good luck with customising your phone!